Vertiv / UPS power

Liebert ITA2 10kVA Equipment information & support

Vertiv Liebert ITA2 10kVA delivers full 10kW active power (PF=1.0) with up to 96% online efficiency and scalable parallel redundancy for critical data networks.

Equipment information

Brand
Vertiv
Equipment model
Liebert ITA2 10kVA
Equipment type
UPS power
Controller / software version
Confirm against the installed equipment
View full product specifications
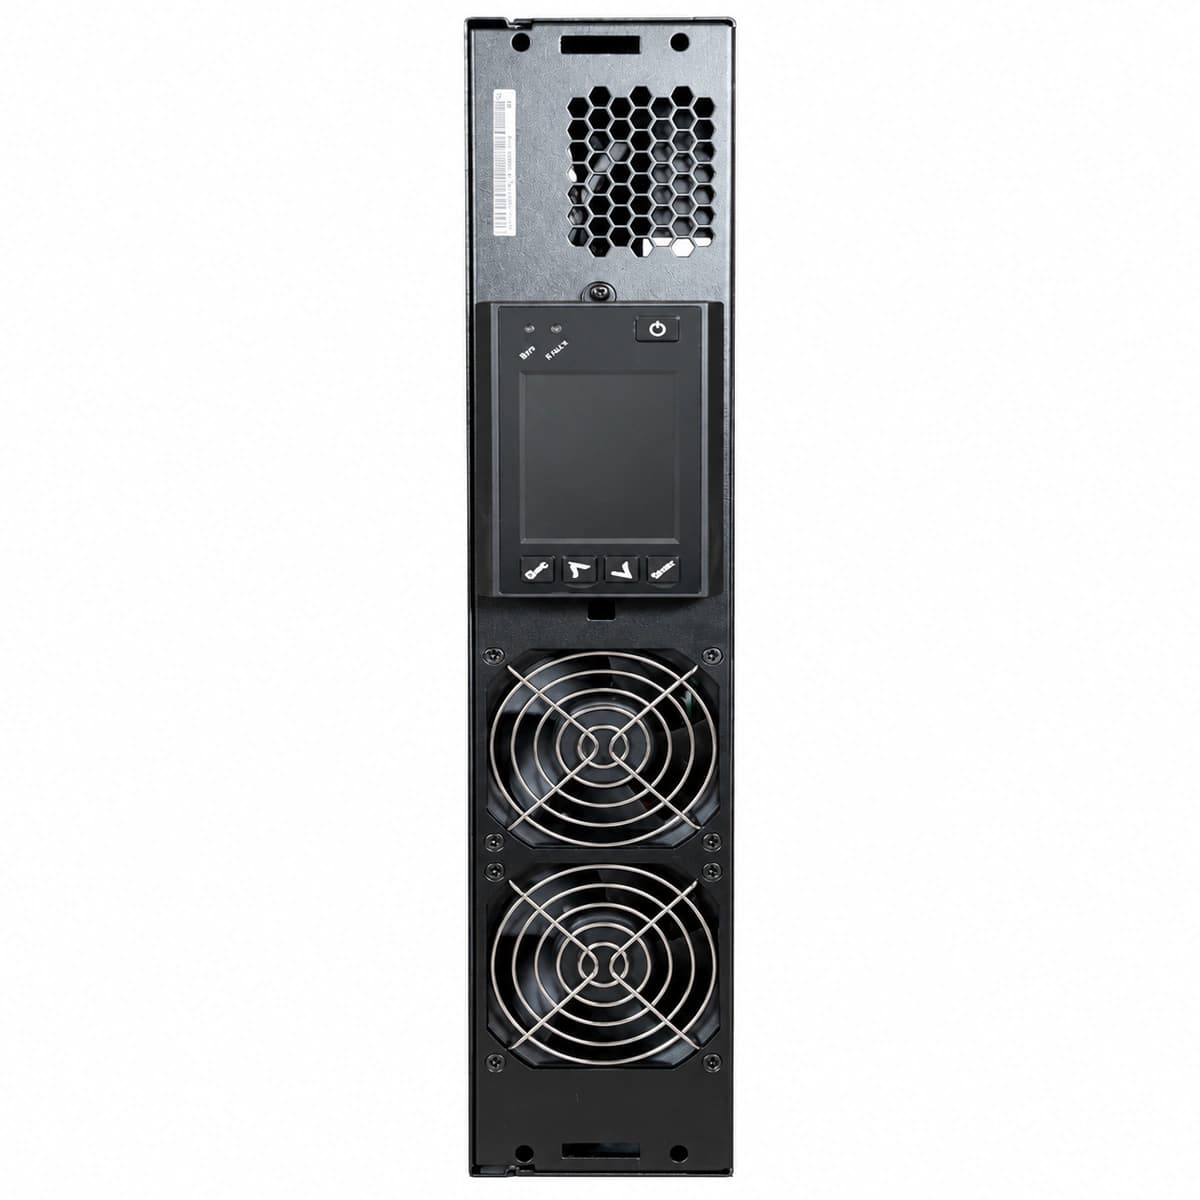
Liebert ITA2 10kVA Official Product View 1

Information below comes from the current product catalogue. Confirm the controller, software version and configuration of the installed equipment separately.

AC Input Voltage Range
100VAC ~ 288VAC single-phase / 173~500VAC three-phase VAC
Nominal DC Output Voltage
220 / 230 / 240 single-phase / 380 three-phase V AC
Physical Dimensions Spec
130 (3U) × 430 × 500 mm
Physical Form Factor
Rack-mount / tower compatible (3U)

Alarms & troubleshooting

BATT_DISC (Battery Breaker Open / Disconnected)
Warning LED solid amber, Battery LED extinguished with flashing fault icon
External battery cabinet circuit breaker is open, DC fuse is blown, or auxiliary contact sensing wire is disconnected.
1. Check and close the DC circuit breaker on the external battery cabinet (EBC); 2. Measure the open-circuit DC bus voltage at the UPS DC terminals with a multimeter; 3. Inspect battery sensing terminals and signal harness for loose connections.
BATT_EOD (Battery End of Discharge Shutdown)
Fault LED solid red, Inverter LED off, continuous audible buzzer
Mains utility prolonged outage; battery string discharged down to the end-of-discharge cut-off threshold to prevent deep cell damage.
1. Restore AC utility mains or start the backup diesel generator to allow automated UPS cold recharge; 2. If mains is normal, verify that the configured battery cell quantity matches physical modules; 3. Measure internal resistance and individual block voltages to isolate deteriorated cells.
INV_FAULT (Inverter Failure Transfer to Bypass)
Fault LED solid red, Bypass LED solid amber, Inverter LED extinguished
Inverter IGBT bridge overcurrent/breakdown, DC link bus imbalance, or DSP drive circuit fault, forcing automatic transfer to static bypass.
1. Confirm the critical load is currently sustained by static bypass without power interruption; 2. Read sub-error code logs via LCD menu (e.g., IGBT overcurrent, DC bus fault); 3. Perform a controlled system restart after shedding load; if the error recurs, replace the power module/driver board.
OVER_TEMP (System Over-Temperature / Heat Sink Fault)
Warning LED solid amber, Cooling fans operating at 100% max RPM, buzzer beeps once per second
Ambient equipment room temperature exceeds 40°C, ventilation intake/exhaust grilles are clogged with dust, or an internal PWM cooling fan has stalled.
1. Check room air conditioning and lower ambient temperature to below 25°C; 2. Clear dust and obstruction from the front air intake bezels and rear exhaust louvers; 3. Verify fan status via LCD telemetry and replace failed fan modules if tachometer feedback is absent.
OUTPUT_OVERLOAD (Inverter Output Overload)
Overload LED solid amber, LCD displays blinking load percentage, rapid intermittent buzzer
Connected terminal equipment exceeds the rated 10kVA/10kW capacity, or downstream inrush current has triggered the inverse-time thermal overload curve.
1. Immediately check PDU branch circuits and disconnect non-critical secondary loads; 2. Reduce the total load below 80% to prevent automatic emergency bypass transfer; 3. Inspect downstream electrical distribution for partial short circuits or phase imbalance.

Access Complete Maintenance & Full Alarm Troubleshooting Manual

This page lists high-frequency critical alarm codes commonly encountered in field maintenance. Comprehensive manufacturer troubleshooting matrices, board-level repair guides, detailed electrical schematics, and firmware commissioning manuals are delivered alongside equipment upon formal project procurement, accompanied by dedicated FAE technical support.

Share on-site information

  1. 01

    Identify the exact model

    Record the nameplate, system model and controller or module model.

  2. 02

    Keep the alarm details

    Record the full alarm text, indicator colour, timing and whether it persists.

  3. 03

    Describe recent changes

    Note recent replacements, software updates or configuration changes.

Record information visible in the existing interface. Electrical measurements, disassembly and replacement should follow the applicable manufacturer's manual and be performed by qualified personnel.

Your model and these details will be added to the enquiry form for you to review before sending.

Related technical articles

Browse the technical guides or send a question about this model.

View all articles

Need a replacement module or supporting equipment?

Confirm the full model, system configuration and compatibility requirements before enquiring about suitable products.

Ask about suitable products

Have a model and an on-site issue?

Share the exact model, alarm text and observed symptoms to help identify relevant information and compatibility requirements.

Request technical support