Huawei / SFP optical transceivers

Huawei 1.25G eSFP 10km Equipment information & support

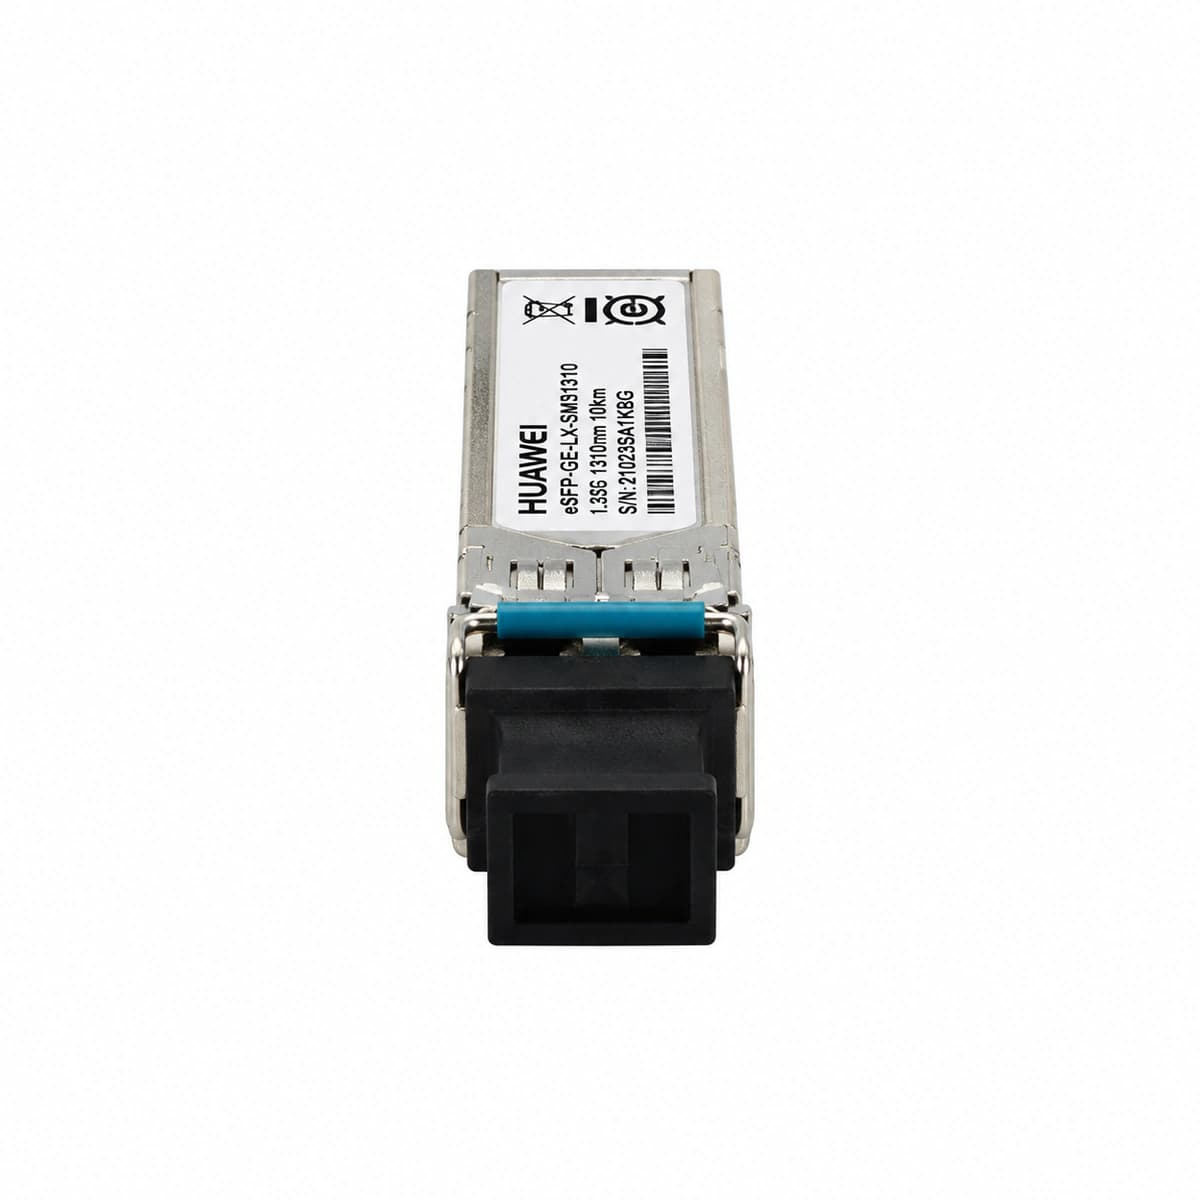
The Huawei 1.25G eSFP 1310nm 10km (eSFP-GE-LX-SM1310) is an enhanced carrier-grade Gigabit Ethernet optical transceiver engineered for robust long-reach links up to 10km over single-mode optical fiber with duplex LC interface.

Equipment information

Brand
Huawei
Equipment model
Huawei 1.25G eSFP 10km
Equipment type
SFP optical transceivers
Controller / software version
Confirm against the installed equipment
View full product specifications
Huawei 1.25G eSFP 10km Official Product View 1

Information below comes from the current product catalogue. Confirm the controller, software version and configuration of the installed equipment separately.

Physical Form Factor
eSFP (enhanced SFP)
Data Rate
1.25 Gbps
Central Wavelength
1310 nm
Maximum Distance
10 km
Fiber Type
Single-Mode Fiber (SMF) (SMF)
Optical Connector
Duplex LC Connector

Alarms & troubleshooting

RX_LOS (Optical RX Loss of Signal)
Port LINK/ACT LED off, System ALM LED solid red
Remote peer transmitter disabled, optical patch cord broken or excessively bent, or dirty LC connector causing input power below receiver sensitivity (<-20 dBm).
1. Run 'display transceiver interface' to verify Rx optical power and alarm status. 2. Use an optical power meter to measure remote Tx and local Rx optical power levels. 3. Clean the LC optical patch cord connectors and the eSFP optical bore. 4. Replace the optical patch cord or test the ODF/outside plant cable infrastructure.
TX_BIAS_HIGH (Laser Bias Current High Alarm)
Port LINK/ACT LED slowly blinking amber, System ALM LED solid amber
Transmitter laser diode (1310nm) degradation or thermal stress causing APC circuit to drive bias current beyond the upper warning threshold to maintain output power.
1. Execute 'display transceiver verbose' to check the present bias current and threshold metrics. 2. Inspect chassis airflow and operating temperature to eliminate external thermal factors. 3. If bias current remains above high alarm thresholds and optical power degrades, proactively replace the eSFP module during a maintenance window.
MODULE_TEMP_HIGH (Transceiver High Temperature Alarm)
Chassis FAN/ALM LED solid or blinking amber, port LINK LED stays solid green
Equipment room ambient temperature above limits, clogged dust filters, fan tray failure, or thermal congestion in dense port layouts causing DDM sensor to exceed 75°C.
1. Run 'display environment' and 'display transceiver interface' to check temperature readouts and cooling status. 2. Clean chassis dust filters and verify that fan trays operate normally without blocked airflow. 3. Verify data center precision air conditioning to keep ambient temperature between 20°C and 25°C. 4. If only this transceiver shows high temperature while adjacent modules are normal, reseat or replace the module.
RX_PWR_LOW (Optical RX Power Low Warning)
Port LINK/ACT LED blinking amber or intermittently flashing green
Excessive optical link attenuation (bad splices, damaged adapters, macrobends, or degraded fiber) or contaminated LC end-faces causing input power near receiver cutoff (below -19 dBm).
1. Run 'display transceiver interface' to check current Rx power and Low Warning thresholds. 2. Clean both LC connector end-faces and optical adapters using a dedicated fiber optic cleaner pen. 3. Use an OTDR on the 10km link to locate high-loss events, bad splices, or macrobends. 4. If outside fiber link attenuation is nominal, verify and replace the remote Tx transceiver if degraded.
PORT_CRC_ERR (Port CRC Error Threshold Exceeded)
Port LINK/ACT LED flashing green rapidly, System ALM LED intermittently blinking
Optical power hovering near sensitivity limit causing elevated bit error rate (BER), chromatic dispersion on long fiber spans, loose LC clip, or internal CDR clock jitter.
1. Execute 'display interface' to monitor the increment rate of CRC and FCS error frames. 2. Check whether Rx optical power stays within the optimal dynamic range (-15 dBm to -3 dBm). 3. Reseat and firmly latch the LC connectors; swap with a verified low-loss test patch cord. 4. If CRC errors continue to increment despite a clean, stable optical path, replace the eSFP module.

Access Complete Maintenance & Full Alarm Troubleshooting Manual

This page lists high-frequency critical alarm codes commonly encountered in field maintenance. Comprehensive manufacturer troubleshooting matrices, board-level repair guides, detailed electrical schematics, and firmware commissioning manuals are delivered alongside equipment upon formal project procurement, accompanied by dedicated FAE technical support.

Share on-site information

  1. 01

    Identify the exact model

    Record the nameplate, system model and controller or module model.

  2. 02

    Keep the alarm details

    Record the full alarm text, indicator colour, timing and whether it persists.

  3. 03

    Describe recent changes

    Note recent replacements, software updates or configuration changes.

Record information visible in the existing interface. Electrical measurements, disassembly and replacement should follow the applicable manufacturer's manual and be performed by qualified personnel.

Your model and these details will be added to the enquiry form for you to review before sending.

Related technical articles

Browse the technical guides or send a question about this model.

View all articles

Need a replacement module or supporting equipment?

Confirm the full model, system configuration and compatibility requirements before enquiring about suitable products.

Ask about suitable products

Have a model and an on-site issue?

Share the exact model, alarm text and observed symptoms to help identify relevant information and compatibility requirements.

Request technical support