Eltek / DC power systems

Eltek Minipack 48/800 WI Equipment information & support

The Eltek Minipack 48/800 WI is a compact hot-pluggable -48V/800W telecom rectifier utilizing advanced resonant soft-switching topology and pure natural convection cooling, engineered specifically for mission-critical, fanless, ultra-silent, and dust-prone industrial deployments.

Equipment information

Brand
Eltek
Equipment model
Eltek Minipack 48/800 WI
Equipment type
DC power systems
Controller / software version
Confirm against the installed equipment
View full product specifications
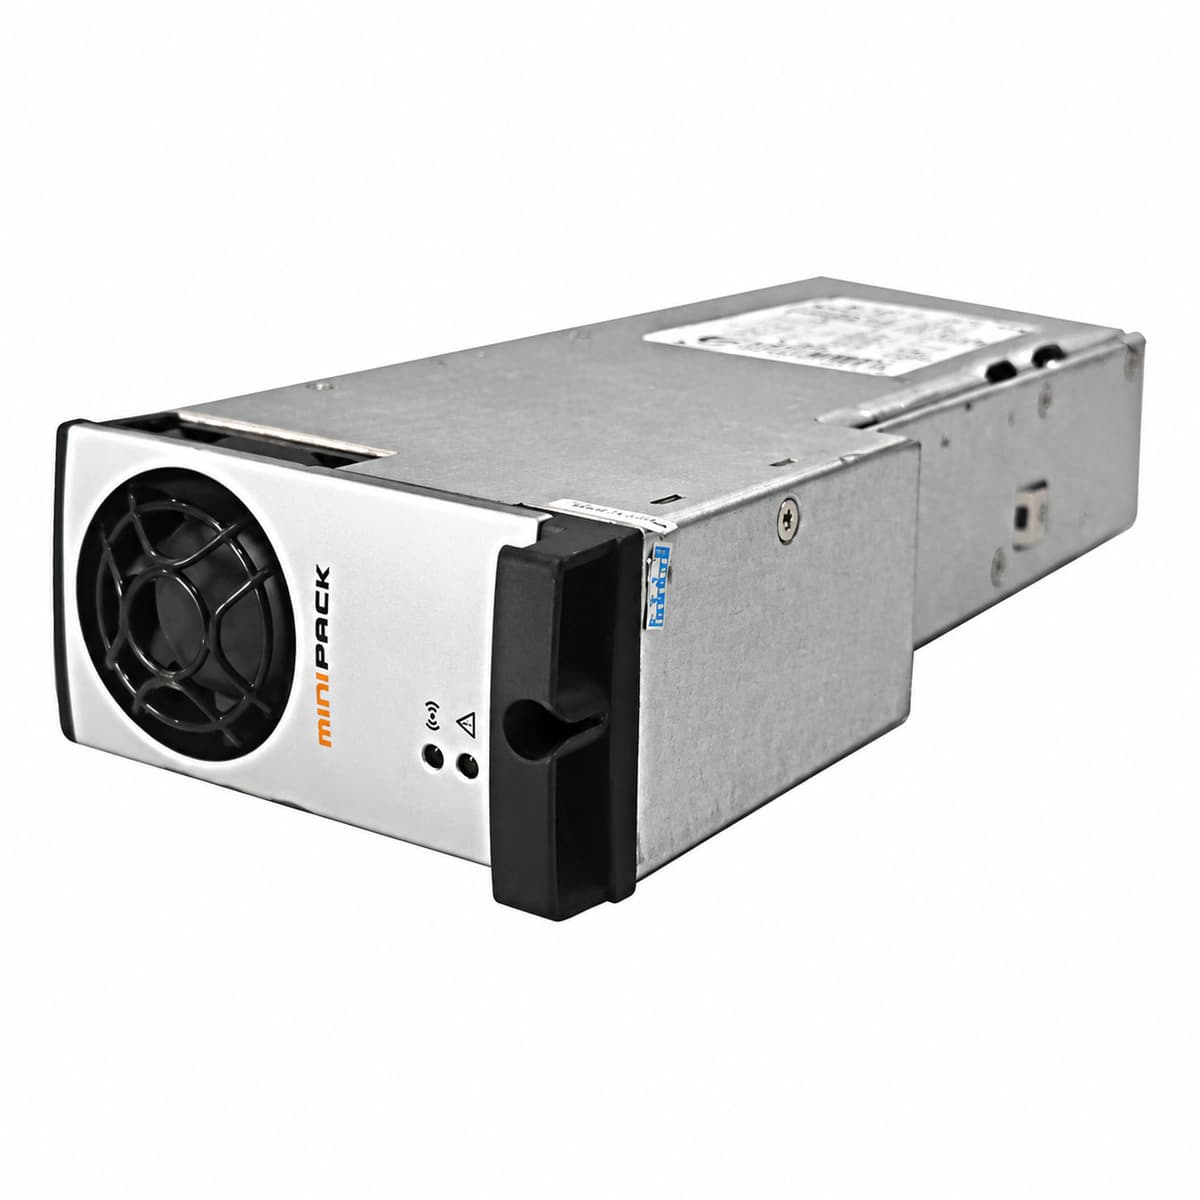
ELTEK Minipack 48/800 WI 48V 800W Fanless Convection-Cooled Rectifier Module Official Studio Photo 2

Information below comes from the current product catalogue. Confirm the controller, software version and configuration of the installed equipment separately.

Rated Output Power
800W
Nominal DC Output Voltage
-48V DC (Adjustment Range: -43.5V ~ -57.6V DC)
Rated Output Current
16.7A (-48V DC)
Cooling Method
Natural Convection Cooling (Ultra-Quiet Fanless)
AC Input Voltage Range
85V AC ~ 300V AC (Rated 100V~250V AC)
Power Conversion Efficiency
> 91%

Alarms & troubleshooting

AC_FAIL (AC Mains Failure / Out of Range)
Green LED OFF, Red LED solid ON (when powered from DC bus)
AC input voltage below 85 VAC or above 300 VAC; AC breaker tripped; phase loss or loose AC wiring harness.
1. Measure AC input voltage at the slot backplane connector using a DMM (verify 85–300 VAC range). 2. Inspect the upstream AC distribution breaker/fuse for trip or failure. 3. Reseat the module and inspect the rear blind-mate connector for burnt pins or physical damage. 4. If AC voltage is verified nominal and fault persists, replace the Minipack module.
HVSD (Output High Voltage Shutdown)
Red LED solid ON, Yellow LED OFF, Green LED OFF
Internal PWM voltage feedback loop failure; DC bus voltage exceeded selective overvoltage threshold (59.5V ±0.5V); internal latch circuit triggered.
1. Unlatch and slide the faulted rectifier out of the shelf; wait 60 seconds to allow bus capacitors to discharge. 2. Reinsert the module firmly to reset the hardware overvoltage latch. 3. Verify DC bus voltage history and alarm threshold settings in the Smartpack controller. 4. If the module instantly locks out with a red LED again, the internal control circuit is damaged; replace the unit.
TEMP_SHUTDOWN (Over-Temperature Shutdown)
Yellow LED flashing (during thermal derating) to Red LED solid ON (upon shutdown), Green LED OFF
Air intake/dust filter blocked; site ambient temperature exceeds +75°C; heatsink clogged with dust; obstructed airflow path.
1. Inspect front intake grilles and honeycomb airflow holes for dust blockages; clean with compressed air. 2. Verify telecom shelter/room HVAC operation and confirm ambient temperature is within -40°C to +75°C limits. 3. Verify whether internal fan is spinning; if the fan is stalled, proceed to fan replacement. 4. Allow the unit to cool down; confirm automatic restart and load recovery once temperatures fall below reset threshold.
FAN_FAIL (Cooling Fan Failure / Low Speed)
Yellow LED solid ON, Green LED solid ON (rectifier output derated) or Red LED solid ON
Fan mechanical bearing seized; foreign object obstructing impeller blades; tachometer feedback circuit disconnected; fan drive circuitry blown.
1. Visually check fan blades for physical obstruction, wire interference, or severe debris build-up. 2. Check fan RPM reading on Smartpack controller diagnostics menu. 3. Extract the module, remove front access cover, and disconnect/replace the faulty DC fan assembly. 4. Reinstall module, power up, verify fan spin-up during power-on self-test, and confirm yellow LED clears.
CAN_COMM_FAIL (CAN Bus Communication Lost)
Yellow LED flashing at 0.5Hz, Green LED solid ON (module operates in fail-safe autonomous mode)
Poor contact on backplane CAN_H/CAN_L pins; Smartpack supervisory controller offline; missing or defective 120-ohm CAN termination resistor; damaged internal CAN transceiver.
1. Verify the Smartpack controller is powered and operating normally without system lockup. 2. Reseat the Minipack module firmly to clear slot connector contact oxidation. 3. Measure resistance across CAN_H and CAN_L with system unpowered (nominal should be ~60 ohms via two parallel 120-ohm terminators). 4. If adjacent modules communicate properly and only one fails, swap the module to confirm whether the slot or module CAN transceiver is damaged.

Access Complete Maintenance & Full Alarm Troubleshooting Manual

This page lists high-frequency critical alarm codes commonly encountered in field maintenance. Comprehensive manufacturer troubleshooting matrices, board-level repair guides, detailed electrical schematics, and firmware commissioning manuals are delivered alongside equipment upon formal project procurement, accompanied by dedicated FAE technical support.

Share on-site information

  1. 01

    Identify the exact model

    Record the nameplate, system model and controller or module model.

  2. 02

    Keep the alarm details

    Record the full alarm text, indicator colour, timing and whether it persists.

  3. 03

    Describe recent changes

    Note recent replacements, software updates or configuration changes.

Record information visible in the existing interface. Electrical measurements, disassembly and replacement should follow the applicable manufacturer's manual and be performed by qualified personnel.

Your model and these details will be added to the enquiry form for you to review before sending.

Related technical articles

Browse the technical guides or send a question about this model.

View all articles

Need a replacement module or supporting equipment?

Confirm the full model, system configuration and compatibility requirements before enquiring about suitable products.

Ask about suitable products

Have a model and an on-site issue?

Share the exact model, alarm text and observed symptoms to help identify relevant information and compatibility requirements.

Request technical support